• Welcome to the BMW R18 Forums. Member registration disables ads and allows you to post and share. Register Here.

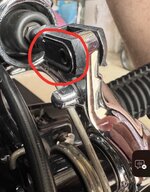
How to remove the black clip/shroud on the brake lever? (RSD upgrade)

  • <i class="fa--xf fal fa-check "><svg xmlns="http://www.w3.org/2000/svg" role="img" aria-hidden="true" ><use href="/data/local/icons/light.svg?v=1789222567#check"></use></svg></i> Discussion starter Discussion starter DRACKO
  • Start date Start date

DRACKO

Member
Site Supporter
Joined
Apr 27, 2024
Messages
57
Location
Weston, Florida
Visit site
Bike
R18 First Edition 2021
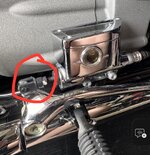
Hi everyone. I’m currently upgrading the brake lever to the Roland Sands Design one, and I've run into a quick question because I want to make sure I don't break anything. Has anyone successfully removed the black clip/shroud that sits on the brake lever clevis? I've attached a picture of the exact piece I'm talking about; it looks like a clip wrapping around the metal structure, but since it’s my first time messing with this specific part, I wanted to ask the experts here before applying too much pressure or pulling it the wrong way. Is there a specific trick to popping it off cleanly so I can install the RSD lever? Any advice or tips from your mechanical experience with these bikes would be highly appreciated. Thanks in advance for the help, ride safe!
 

Attachments

  • IMG_6831.jpeg
    IMG_6831.jpeg
    642.9 KB · Views: 21
  • IMG_6832.jpeg
    IMG_6832.jpeg
    460.3 KB · Views: 21
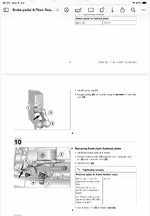
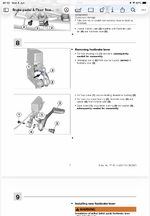
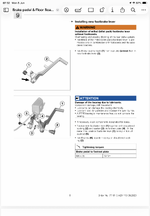
It is a sprung clip. Lift it up with something that will not mark metal. Then slide the pin out. I find clothes pegs great for things like this. My misses is always moaning they seem to walk. 🙄. See from page 8 of the attached. It will just push back down using the pin as the pivot.
 
Last edited:
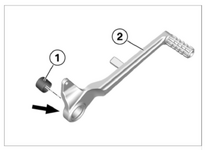
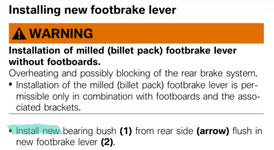
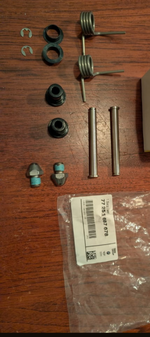
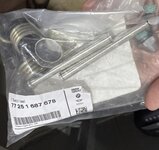
I had ordered a new hardware pack (P/N 77 25 1 687 679), in order to install a new bearing bushing (Call Out No. 1); it is directional, so take note as to which end gets pressed into the rear side of the brake lever:

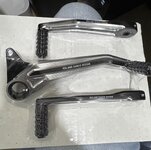
See left over parts image below, since I didn't swap my original OEM floorboards; I only swapped the levers for the RSD style.

Screenshot_20260608-044625.pngScreenshot_20260608-044658.png

Screenshot_20260605-133508.png
 
You installing the floorboards, as well as upgrading the foot controls?
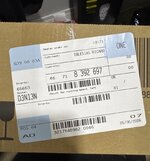
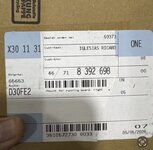
Hi @Star-Lord. That's exactly the plan! I'm swapping the stock pegs on my First Edition for the complete Roland Sands floorboard and control kit. I already got the OEM BMW Classic base mounts and the complete hardware pack (springs, pins, bolts), so I'm fully ready to go! Right now, I'm just figuring out the installation steps and checking what tools I'll need so I don't scratch or damage anything during the process. Any tips are welcome! 😉
 

Attachments

  • IMG_6848.jpeg
    IMG_6848.jpeg
    312.1 KB · Views: 5
  • IMG_6849.jpeg
    IMG_6849.jpeg
    377.4 KB · Views: 5
  • IMG_6850.jpeg
    IMG_6850.jpeg
    341.5 KB · Views: 5
  • IMG_6851.jpeg
    IMG_6851.jpeg
    358.6 KB · Views: 5
  • IMG_6852.jpeg
    IMG_6852.jpeg
    400 KB · Views: 5
You might need to swap the kickstand.. I ran into that snag, when I installed the floorboards on the first edition bobber project bike..
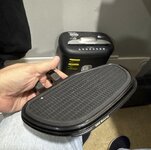
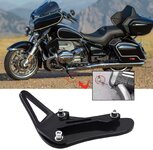
Thanks for the heads-up, @Star-Lord! I appreciate you sharing your experience from your First Edition Bobber project. From what I’ve been reading online (but I’m definitely going to follow what you guys tell me in the end), it seems like the kickstand arm itself might be the same across models?, and the real issue is just the floorboard completely burying the stock tab? 🤔. Since I'm not entirely sure if that's accurate and want to avoid buying a new OEM kickstand, I’m trying a workaround. I just ordered this aftermarket side stand extension pad (see attached photo) that adds a metal triangle loop sticking out further back. Based on your experience installing those boards, do you think an extension like this will give me enough clearance to reach the stand from underneath? Or is there something else about the geometry that will still mess it up? Would love to hear your thoughts before I start tearing things apart!
 

Attachments

  • IMG_6854.jpeg
    IMG_6854.jpeg
    284.7 KB · Views: 9
What do you think about this? @KevinQ posted this: "I went from floorboards to pegs on my 22 classic. Kickstand size doesn't really change...there is a boss/rubber bumper near the foot of the kickstand that isn't shared between the peg and floorboard models. The only difference between peg equiped r18s and floorboard equiped kickstands are minor and prevent the kickstand from making metal to metal contact with the hinge of the floorboard."
 
Last edited:
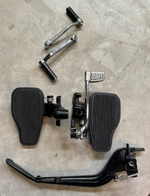
The below image shows the floorboard parts that I traded for pegs during the bobber project; the kickstand is slightly different, which I believe has a rubber bumper or stop so as not to make metal on metal contact.

I'm still looking into it though..

Screenshot_20260609-170208.png
 
Back
Top