Another three hours prep, marking guidelines for the tape edges, grinding two out of every four spoke nipples, the ones that protrude by about 4.5mm, reducing them by a couple of mm to the same height as the others only on the front wheel. I used an angle grinder in the end as my Dremel gave up the ghost, and more sanding.
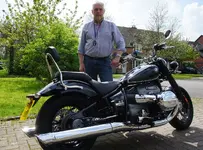
I thought I would report on the completion of the rear wheel Outex install. Using kit R50 for 17x4.5MT~5.5MT 64mm tape width.
Things to be aware of:
The x-sectional profile of the rim well is not symetrical (rear rim only).
The valve stem hole is offset from the nominal centreline of the spokes (rear rim only).
The pre-cut hole for the valve stem in the protective tape is in the centre.
I made the assumption that the sealing tape should be centred on the nominal centreline of the spokes - so there is even coverage on either side of the spoke recesses. practicing with some 3M tape which had some pliability lead me to believe that the difference in the profile would not be a problem stretching the tape to accommodate a difference in shoulder diameter left and right. I was wrong!
The Outex tape is like a sheet of very sticky rubbery gel, it is very plable and stretchy. It requires a backing tape which serves two purposes: the first is you can supply it on a roll and apply pressure when installing; the second is to stop the gel from stretching as you apply it. It is this latter property that causes a problem with an assymetric rim profile. You cant keep it running straight between your marker lines. It runs off to one side very quickly and there is no give in it to correct it.
I laid down two marker lines centred on the spokes, which means that one edge of the tape has to follow a different diameter to the other. With hindsight, an alternative might have been to offsett the tape so it was in a symmetrical part of the profile, as there would still be sufficient cover on the narrower side.
With the guidance for mOutex saying that there is sufficient tape to be able to make future repairs, I decided to cut the sealing tape at locations where the spokes are furthest appart (another irregularity of the rims) when it had gone too far off course, and then start again, with a gap between the two ends. I had to make about 5 cuts in all. I then cut a strip of sealing tape, removed a backing tape from either side of the break, and patched the gap. With hindsight, it might have been better to have removed the backing tape a few cms at a time or whenever you needed to make an adjustment.
Fortunately before all this I decided to see whether the end of the protective tape,a s determined by the position of the pre-cut valve stem hole, would fall between two spokes, and cut it so that it did. What I then realised was that with the valve stem hole not being central to the centreline of the spokes, the protective tape would be offset 3-4mm from the sealing tape. So I punched a new hole slighty to the side of the pre-cut hole, so the tapes would line up. With hindsight, and plenty of spare protective tape on the roll, I should have cut the holed section off and punched a new hole.
After removing the backing tape from all the sections and patches of the sealing tape, I applied the protective tape. Much to my relief, this tape does stretch, so will correct for the assymetric profile. So got round in one and covering the double layer of sealing tape at all the joins.
My tyre shop fitted the tyre an hour later, with 50psi. No obvious leaks. But I will report back in a few days.
I thought the rear wheel would be easy! I am not looking forward to doing the front. Was going to do a video, but as two pairs of hands were needed, the other half objected.