I was really debating on whether or not to bother posting any of these photos, as I never actually installed my "Battery Tender" direct battery terminal to trickle charger leads. However, given how new our bikes are, and the dearth of photos and really ANY technical information on the interwebs concerning the R18's, I thought that maybe SOMEONE out in the internet might get some use out of my photos.
While flipping through my owners manual like a "Which-way" book during "battery removal", I happened upon BMW's recommendation that direct charging the battery should take place OFF the motorcycle. BMW makes a trickle charger for our R18's that apparently is on-board computer friendly (translates: won't void warranty). While a DIY of me obtaining said BMW charger, then plugging it into one of the power plugs on the bike is hardly a compelling forum read, I did learn a couple things about our bikes that (in my own experience) are different from prior generations.
1. The side panels ARE 100% plastic and flexible. While they are reminiscent of the metal/plastic covers of the r1200c bikes, the tines on these covers are also plastic. The rubber grommets on the frame however, are still rubber grommets. Benefit of side covers being 100% plastic? FAR less chance of them vibrating loose and literally flying off the bike while cruising down the road, as well as being more amenable to plastic repair methods, should any tines break down the road. Downside? Well...they're plastic? Maybe they'll be more likely to break with UV damage over time? I'd say just take care of your bike and you "should" be just fine.
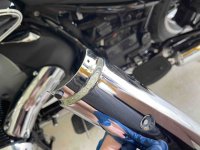
2. When removing the side chrome exhaust pipe covers, particularly the section needed to remove the passenger footrest, you will very likely either break off or unseat the small anti-vibration rubber bushings that the chrome piece squeezes against. I don't really see any way to avoid this unless you know to remove the clamping tension with both your hands while gently pulling the cover piece off. I couldn't fit those photos in with this post, so I'll put the bushings into the very next post down from this one.
Recommendation for the rubber bushings: Either have JB Weld handy (like I did) or know about these rubber bushings ahead of time and order a couple extra from the dealer and just expect to replace one or more when/if you need to remove the chrome side exhaust covers.
Anyways, here they are in order:

Parked and ready for the trickle charger install (or, so we thought at this time).

Right-hand cover removed. Note the four rubber grommets that the plastic tines fit into. Also the side panel is surprisingly flexible, so don't feel like you're about to break anything if you need to flex the panel a little. However, common sense must prevail...don't beat on it if you aren't getting it to fit, just start with the top-angled grommet, then feel with your fingers for the bottom two tines and grommet connections, then press inwards with your palm. These panels don't give any sort of "CLICK" noise or feel when installed, so make sure you press firmly but not overly-hard over each tine location to ensure the panel is 100% secure.
I say this because when I went to remove my left-hand panel, my bottom-two tines were hanging loose! Note this is the first time I've EVER done anything to this bike.
And, if I'm not mistaken, the box contained within the frame is the rear ABS unit (given the brake lines on top ). Behind the ABS unit is the NEGATIVE side of the battery by the way.

And a shot of each right-hand side panel tine location. Note how the top-most tine is facing towards the front of the motorcycle? You'll want to install this tine first when reinstalling the entire panel.

Moving to the left-hand side.

Here's the ODB-II diagnostic plug on the very top in its holding plug. The white box inside with the QR code is the AGM battery, but first I needed to remove the left-side passenger peg and chrome exhaust cover.
Also note the location of the grommets. The bottom two grommets are part of the battery cover itself and this is what was loose when I went to remove my cover.

Again, a repeat shot of the tines, just left-hand side this go-around.

Removal of the left-hand passenger foot peg. None of this is difficult to do, and the only reason I was wearing gloves was to keep MY dirty prints off the shiny chrome!

My next post down from this will show the exhaust cover, but it does need to be removed in order to take out the bottom foot peg bolt.

I then took off the battery cover and at this point realized what BMW was saying in the owners manual about directly charging batteries on the bike...
Part two coming momentarily.
Mike
While flipping through my owners manual like a "Which-way" book during "battery removal", I happened upon BMW's recommendation that direct charging the battery should take place OFF the motorcycle. BMW makes a trickle charger for our R18's that apparently is on-board computer friendly (translates: won't void warranty). While a DIY of me obtaining said BMW charger, then plugging it into one of the power plugs on the bike is hardly a compelling forum read, I did learn a couple things about our bikes that (in my own experience) are different from prior generations.
1. The side panels ARE 100% plastic and flexible. While they are reminiscent of the metal/plastic covers of the r1200c bikes, the tines on these covers are also plastic. The rubber grommets on the frame however, are still rubber grommets. Benefit of side covers being 100% plastic? FAR less chance of them vibrating loose and literally flying off the bike while cruising down the road, as well as being more amenable to plastic repair methods, should any tines break down the road. Downside? Well...they're plastic? Maybe they'll be more likely to break with UV damage over time? I'd say just take care of your bike and you "should" be just fine.
2. When removing the side chrome exhaust pipe covers, particularly the section needed to remove the passenger footrest, you will very likely either break off or unseat the small anti-vibration rubber bushings that the chrome piece squeezes against. I don't really see any way to avoid this unless you know to remove the clamping tension with both your hands while gently pulling the cover piece off. I couldn't fit those photos in with this post, so I'll put the bushings into the very next post down from this one.
Recommendation for the rubber bushings: Either have JB Weld handy (like I did) or know about these rubber bushings ahead of time and order a couple extra from the dealer and just expect to replace one or more when/if you need to remove the chrome side exhaust covers.
Anyways, here they are in order:
Parked and ready for the trickle charger install (or, so we thought at this time).
Right-hand cover removed. Note the four rubber grommets that the plastic tines fit into. Also the side panel is surprisingly flexible, so don't feel like you're about to break anything if you need to flex the panel a little. However, common sense must prevail...don't beat on it if you aren't getting it to fit, just start with the top-angled grommet, then feel with your fingers for the bottom two tines and grommet connections, then press inwards with your palm. These panels don't give any sort of "CLICK" noise or feel when installed, so make sure you press firmly but not overly-hard over each tine location to ensure the panel is 100% secure.
I say this because when I went to remove my left-hand panel, my bottom-two tines were hanging loose!
Note this is the first time I've EVER done anything to this bike.And, if I'm not mistaken, the box contained within the frame is the rear ABS unit (given the brake lines on top
). Behind the ABS unit is the NEGATIVE side of the battery by the way.And a shot of each right-hand side panel tine location. Note how the top-most tine is facing towards the front of the motorcycle? You'll want to install this tine first when reinstalling the entire panel.
Moving to the left-hand side.
Here's the ODB-II diagnostic plug on the very top in its holding plug. The white box inside with the QR code is the AGM battery, but first I needed to remove the left-side passenger peg and chrome exhaust cover.
Also note the location of the grommets. The bottom two grommets are part of the battery cover itself and this is what was loose when I went to remove my cover.
Again, a repeat shot of the tines, just left-hand side this go-around.
Removal of the left-hand passenger foot peg. None of this is difficult to do, and the only reason I was wearing gloves was to keep MY dirty prints off the shiny chrome!
My next post down from this will show the exhaust cover, but it does need to be removed in order to take out the bottom foot peg bolt.
I then took off the battery cover and at this point realized what BMW was saying in the owners manual about directly charging batteries on the bike...
Part two coming momentarily.
Mike


 broken bushing, so I took some JB Weld and tacked it in place where it normally sits. I let it cure overnight.


