Agreed - those wheels absolutely need to be spoked, and correctly spoked, more so on the Classic as you said. The Outex(R) Kits come with everything you need in the correct quantities and I do tend to get lost with all the different 3M product numbers at times. They really should clean up their marketing act.
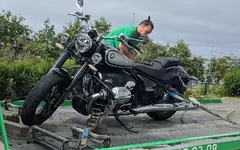
First thing obviously is to remove tires, tubes and rubber rim bands and to thoroughly check that the wheels run as true as you wish and what not - now is the best time to vet spoke tightness too. Best have a spoke torque wrench ready for that. Next inspect the spoke nipple surfaces inside the rims - remove any irregular protrusions and sharp edges with the Dremmel. I coat all ground edges with Birchwood Casey(R) gun-metal blue following that (
https://www.amazon.com/BW-Casey-Aluminum-Black-Touch-Up/dp/B002JCW2CG/ref=pd_bxgy_img_sccl_1/132-1352578-6743467), but the R18 has Alu rims and SS spokes, so no need in this case. Install the wheel spacers with a piece of threaded bar and fender washers, to allow deep-cleaning the rims (soapy water and a brush). Rinse well and blow thoroughly dry with compressed air, especially around the nipples. This might need to be done twice, depending on how many miles the tires were on. Next, clean the rim insides with glass/window cleaner and wipe again thoroughly with a soft clean cloth.
Now is a good time to read the Outex instructions, watch some videos (
http://www.outex.jp/tubelesskitenglishlist.htm) and to do a trial run installing the double-sided tape, but using painters' tape or masking tape, of the appropriate width, instead. Mainly to determine how you will stand or kneel, how you will roll the wheel and work out bubbles, where you need your tools to be and how you will prevent your own sweat from dripping all over the job. You do not want to discover issues with your own application method once you started laying down that double-sided tape. That stuff is wicked sticky and cannot be satisfactorily removed. The main thing is to consistently lay the tape over the rim center, covering nipples properly, and not to unduly stretch the tape while doing that. Do the trial run on the front wheel which has the deeper valley and uses the narrower tape. Don't fret - it is not nearly as daunting as I might make it sound, but it is extremely frustrating if you mess something up due to your own poor planning and preparation. Especially when 'experience' is supposedly the one sure thing validating us not having crossed our 'better-before-date' yet (-: It is a surprisingly quick install once you get your rhythm.
Clean the rims again with window cleaner, wipe dry, and finally clean it with rubbing alcohol and wipe dry again. Now start application as per your preferred video. Woody's supply a goop that they suggest using on the spoke nipples, instead of the small cutout decals in the Outex kit. I prefer the decals nevertheless. Do not skip installing these, as some folk has unwisely opted on occasion. They make it possible to adjust the spokes in future without damaging the Outex installation.
Now, reinstall your tires, sans tubes, and start smiling. I run FOBO(R) Bike 2 (
https://www.amazon.com/FOBO-Pressure-Monitoring-Systems-Black/dp/B07Q21RNNB) TPMS on most of my rides now.
Main take-aways from earlier installations: 1) plan the job, 2) thoroughly clean the rims and 3) diligently remove trapped air while laying the tape and subsequent to that the translucent band. Removing air bubbles later can be a total PITA. You can also send your wheels to Woody's, should you wish to rather have it done than sweating through the motions.