Navigation
Install the app
How to install the app on iOS
Follow along with the video below to see how to install our site as a web app on your home screen.
Note: This feature may not be available in some browsers.
More options
You are using an out of date browser. It may not display this or other websites correctly.
You should upgrade or use an alternative browser.
You should upgrade or use an alternative browser.
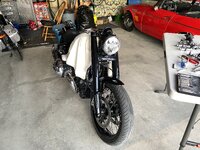
Wunderkind Handlebar
- Thread starter NAZMAN81
- Start date

Ulrich
Well-known member
Would you have any pics taking the clutch side grip off? ... mine is a bit loose and I try to come up with a solution for hat
Ulrich
Well-known member
Actually never mind ... I just checked again and the setscrew had backed out a bit .. all good ")
Glad to be of assistance 
I’m struggling with the last part of this install - drilling a hole through the handlebar. Any suggestions, tips or pointers are appreciated. I have basic tools
I’m struggling with the last part of this install - drilling a hole through the handlebar. Any suggestions, tips or pointers are appreciated. I have basic tools
Scott Semone
Well-known member
Center punch the surface of the handlebars in order to give the drill bit a purchase point; maybe use a uni-bit or stepper bit and gradually get to the diameter.Glad to be of assistance
I’m struggling with the last part of this install - drilling a hole through the handlebar. Any suggestions, tips or pointers are appreciated. I have basic tools
Ulrich
Well-known member
^ ... what Scott said ... step-bits are great! ... but make sure to de-burr the inside of the hole ... to avoid nasty surprisesCenter punch the surface of the handlebars in order to give the drill bit a purchase point; maybe use a uni-bit or stepper bit and gradually get to the diameter.
I used my pocket knife and etched a cross over the spot. It worked but I should invest in a center punch for the future - thanks YouTube.Center punch the surface of the handlebars in order to give the drill bit a purchase point; maybe use a uni-bit or stepper bit and gradually get to the diameter.
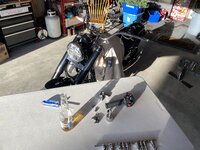
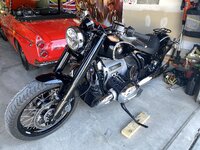
The install is complete however the brake and clutch lines that come with the kit are way too short. I had to make the original ones work.
Just need some V10 clutch fluid and a brake flush and I’m ready for a ride.


Attachments
215robert
Member
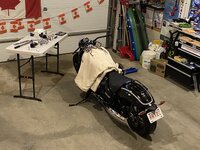
Looks good, which are those the touring or the low?
Frenchie
Active member
nice Datsun Fairlady...;-)It’s the low. The riding position is a lot more sporty/leaned forward. I’ll attach a picture of how I made the original hydraulic and brake lines work.
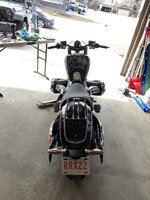
Next is going to be the bigger wheels 21” front and 18” rear.
Thank you.nice Datsun Fairlady...;-)
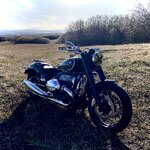
It’s definitely not a long range handlebar
Attachments
R18 100
Active member
There was a comment earlier about the value of de-burring to avoid surprises. This applies to plumbing half inch copper feed lines to your house also. I discovered that water swirls in a pipe caused by burrs after a cut will eventually cause a solder joint to fail. 3rd solder joint just failed spraying water like a squirt gun for days against sheet rock in the furnace room ceiling..