R18Holan
Well-known member
leather

Follow along with the video below to see how to install our site as a web app on your home screen.
Note: This feature may not be available in some browsers.
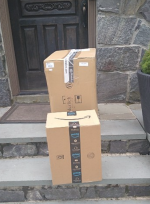
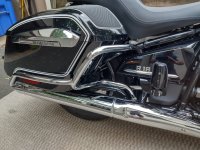
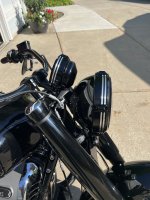
Have to say, they look really smartWunderlich Case Protection Bar install went super smooth (1.5 hrs.); with the help from my son. Perfect father - son stuff, I didn't have to totally remove the side cases electrically, nor the seat wiring as well - where my son was able to hold the case in place; plus the father-son stuff keeps my wife from giving me the stink eye when boxes arrive in the mail.
DIY folks - invest in a torque wrench and lots of locktite (blue); BMW uses that stuff on EVERYTHING... Like Frank's Red Hot sauce..


Wunderlich did a great job with this product; shipped box was packed extremely well and the installation documentation was very easy to follow; which had all of the torque values clearly displayed. Also, the mounting holes and anchor points fit perfectly to the R 18 frame; I'm extremely impressed with the Wunderlich folks - I can't believe this was the first of hearing about them, being a long time previous BMW GS Adventure owner for years... I always leaned towards Touratech in the past.Have to say, they look really smart
the draftsman returns from vacation at the beginning of September and only then will we put the project on the laser and bending machineHi R18Holan, when will the tail tidy ( metal bracket ) be available ? Thanks.
I finally received one as well. I cannot locate any installation instructions on the BMW site. Did you find the instructions anywhere?View attachment 6321View attachment 6320View attachment 6319
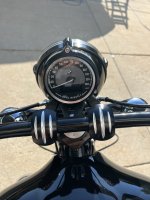
With the arrival (finally avail) Speedo housing I am unofficially done. What a great bike.
No but I can talk you down.I finally received one as well. I cannot locate any installation instructions on the BMW site. Did you find the instructions anywhere?
I finally received one as well. I cannot locate any installation instructions on the BMW site. Did you find the instructions anywhere?
I was referring to the Speedometer Shell.Installation manual
www.bmw-motorrad.co.uk
Scroll down and select R-Modelle Heritage and then R18 and it will give you available instructions. Headlight cover is the top one.
My mistakeI was referring to the Speedometer Shell.
Hum, soft of wondering if some film (3m?) should be put on top of tank. Picked up a used bmw cell phone holder from member on the forum and before I pick up the new bike would like to put some on it then put on the cell holder.A thread about little mods and tweaks. When good enough isn't quite good enough...
3M protective tape between rubber pillion seat feet and rear fender.
View attachment 223
I put a little talc on the rubber feet to sort out exactly where they landed. The result is not super pretty but it's effective.
Nate
***Those are not scratches but merely reflections. Kinda did a double-take there.
Figure it out better than me?
I have to confess I had a few shards of plastic on the table when I finally got it apart.Figure it out better than me?

Looks soooo worth a few shards!I have to confess I had a few shards of plastic on the table when I finally got it apart.